How to install and configure Coupomated connect plugin on your WordPress website?

Nayan Sharma
Last Update há 2 anos
How to install Coupomated connect plugin on your WordPress website?

1. Go to the integration section of the publisher dashboard and click on WordPress and download the plugin by clicking on the Download icon. This should download a zip file onto your system.

2. Next, go to your WordPress website, and under plugins, click on add a new option. Then click on the upload plugin option and then click on choose file and upload the zip file that you have downloaded from our website. Next, you click on Install and then activate the plugin.
Check video tutorial:-
How to set up the Coupomated Connect plugin on your WordPress website?

1. Go to the integration section of the publisher dashboard and click on API and copy the API key.
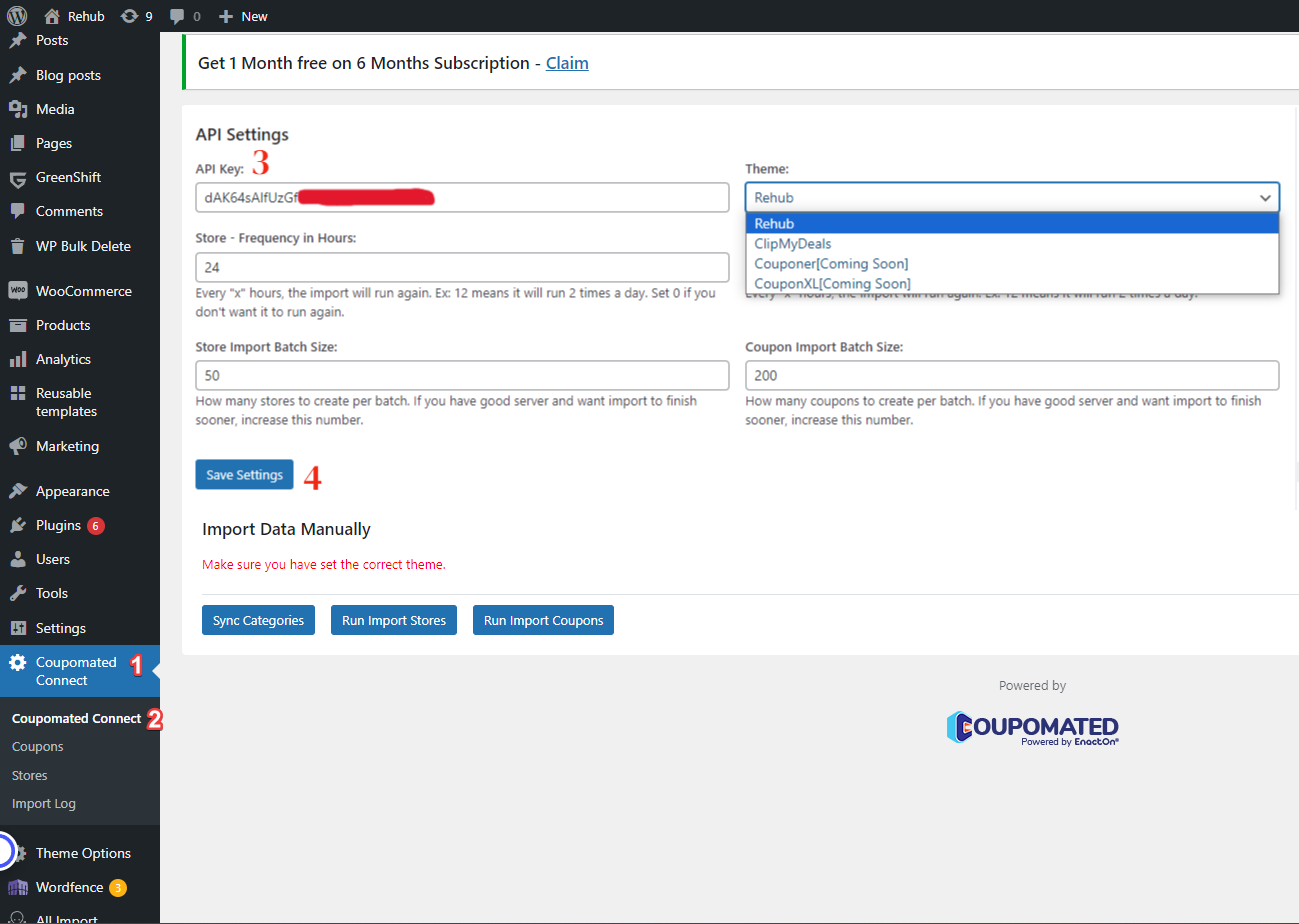
2. Now go to your WordPress website and click on Coupomated Connect then add your API key and set Store and Coupon import frequency in hours and select your theme and click on save button.
Check video tutorial:-
How to import categories using Coupomated Connect plugin on your WordPress website?
Every time when you run “Store import” then all the selected merchants from the Coupomated panel will create new categories for stores or offers or offers tags in your WordPress website, now if you do not want our plugin to create a new category on your system and retain the stores that you have then you need to do categories mapping.

If in your affiliate stores, there is a category with a different name for reference Travels & Tours, and in the Coupomated panel if the category name is Travels then you can map it. Copy the Category name and Category Id
E.g
1. Category name – Travels & Tours
2. Category Id - 70

2. Click on the data feed of the Coupomated panel and then go to Merchant mapping and add Store Id and Store name.
Check video tutorial:-
How to import stores using Coupomated Connect plugin on your WordPress website?

1. Go to your WordPress website and click on Coupomated Connect then click on the “Run Import Stores” button.

2. To check the import log, click on Coupomated Connect and the click on “Import log” button.

3. To check which stores are being imported, click on Coupomated Connect and then click on the “Stores” button.
Check video tutorial -
How to handle existing stores or map merchant using Coupomated Connect plugin on your WordPress website?
Every time when you run store import then all the selected merchants from the Coupomated panel will create new stores in your WordPress website, now if you do not want our plugin to create a new store on your system and retain the stores that you have then you need to do merchant mapping.

If in your affiliate stores, there is a store with a different name for reference 100mg, and in the Coupomated panel if the store name is 1mg then you can map it. Copy the Store name and Store Id
E.g
1. Store name – 100mg
2. Store Id - 4504

4. Click on the data feed of the Coupomated panel and then go to Merchant mapping and add Store Id and Store name.
Check video tutorial:-
How to import coupons using the Coupomated Connect plugin on your WordPress website?

1. Go to your WordPress website and click on Coupomated Connect then click on the “Run Import Coupons” button.

2. To check the import log, click on Coupomated Connect and the click on “Import log” button.

3. To check which Coupons are being imported, click on Coupomated Connect and then click on the “Coupons” button.
Check video tutorial:-
How to Re-Trigger Import using the Coupomated Connect plugin in your website?
Sometimes you may notice that the coupon or store import did not complete or it has stopped or it didn't begin. This happens because of the way WordPress Cron works. To re-trigger the incomplete import run please follow the steps;
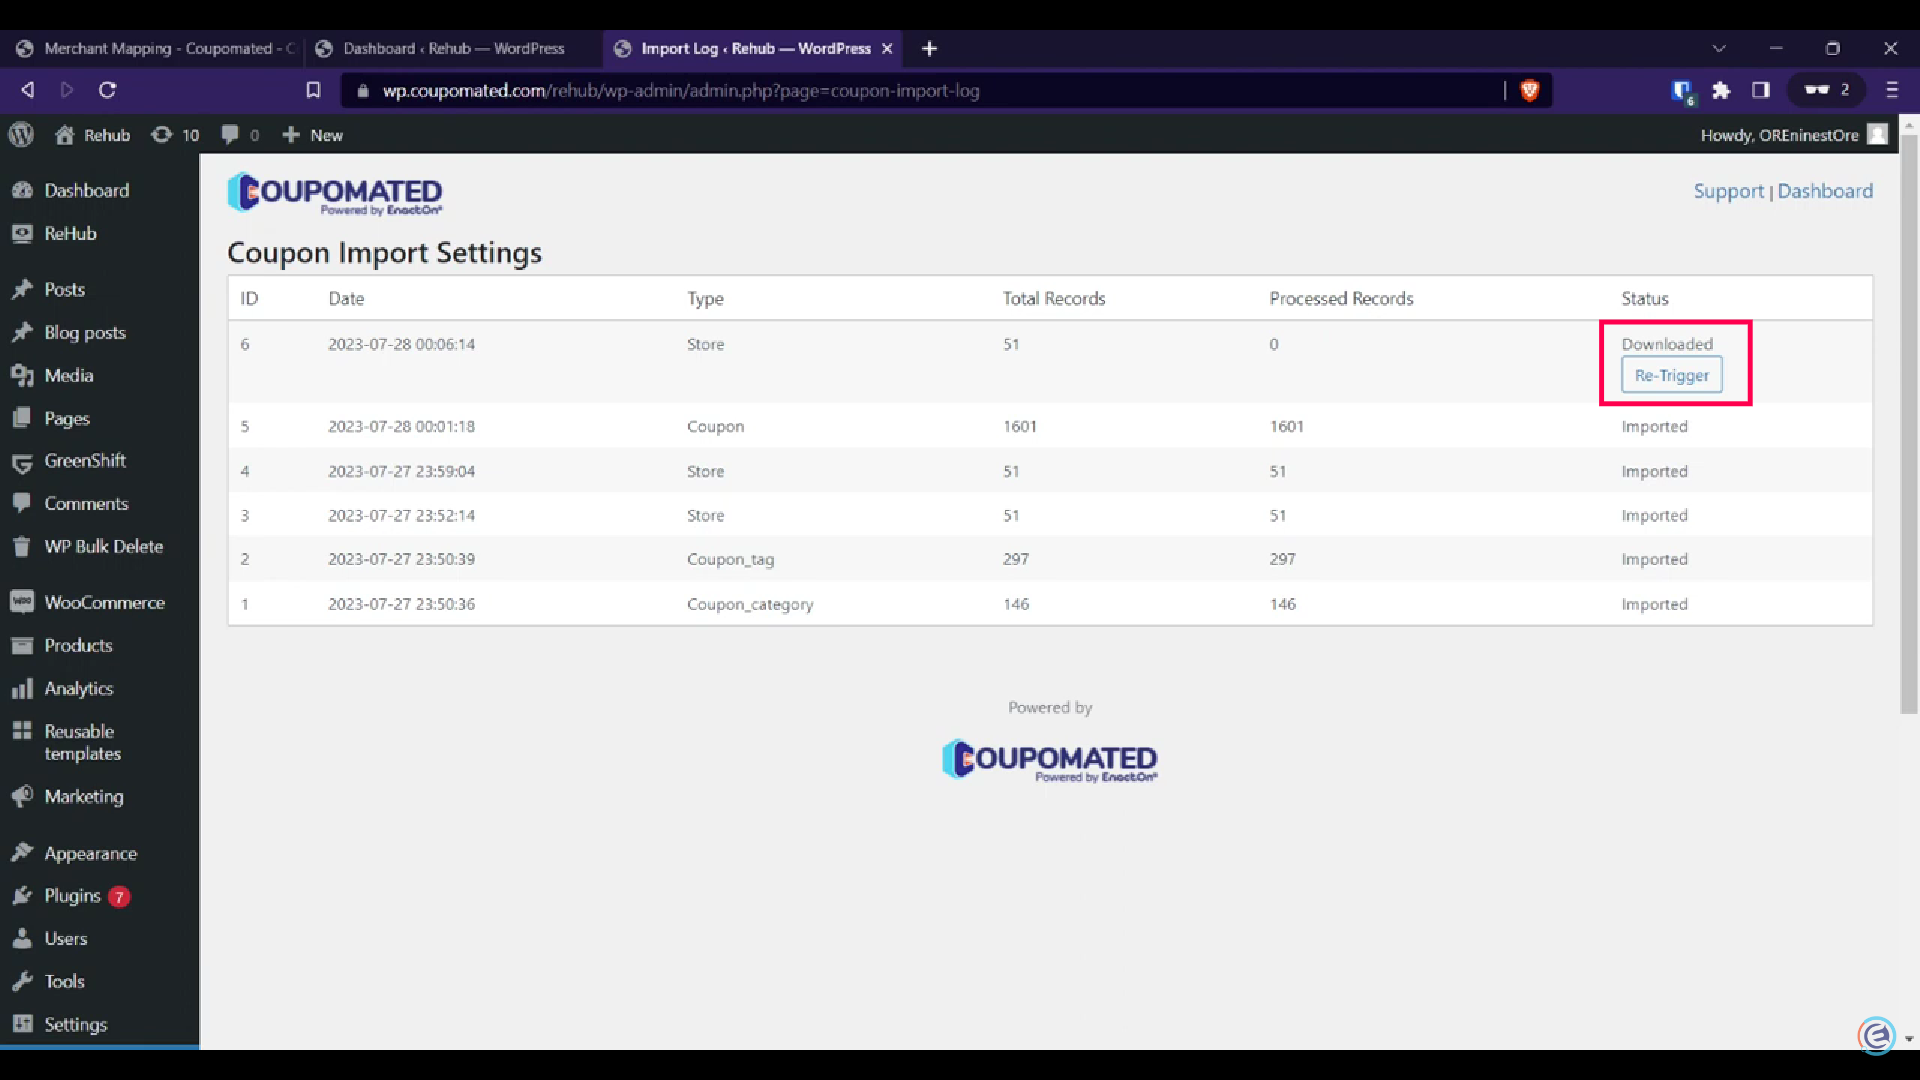
Click on to Coupomated connects on your website and go to Import log, then click on Re-trigger button.
Check video tutorial:-